How to Create Bootable Ubuntu USB Stick on Windows
Updated on
•3 min read
This tutorial will walk you through the process of creating a bootable Ubuntu USB stick on Windows. You can use this USB stick to boot and test out or install Ubuntu on any computer that supports booting from USB.
Prerequisites
- A 4GB or larger USB stick drive.
- Microsoft Windows XP or later.
Creating Bootable Ubuntu USB Stick on Windows
Creating Bootable Ubuntu USB Stick on Windows is a relatively straightforward process, just follow the steps outlined below.
Downloading Ubuntu ISO file
To download the Ubuntu ISO file, visit the Ubuntu downloads page, where you can find download links for Ubuntu Desktop, Ubuntu Server, and various Ubuntu flavors.
Most likely, you will want to download the latest Ubuntu LST Desktop version.
Installing Etcher
There are several different applications available for free use, which will allow you to flash ISO images to USB drives. In this tutorial, we will create a bootable ubuntu USB stick using Etcher.
Etcher is a free and open-source utility for flashing images to SD cards & USB drives and supports Windows, macOS, and Linux.
Head over to the balenaEtcher downloads page , and download the most recent Etcher for Windows.
Once the installation file is downloaded, double-click on it to launch the installation wizard. Follow the installation wizard’s steps to install Etcher on your Windows desktop.
Flashing Ubuntu ISO file to the USB Stick
Creating a bootable Ubuntu USB stick with Etcher is an easy task to perform.
Insert the USB flash drive into the USB port and Launch Etcher.
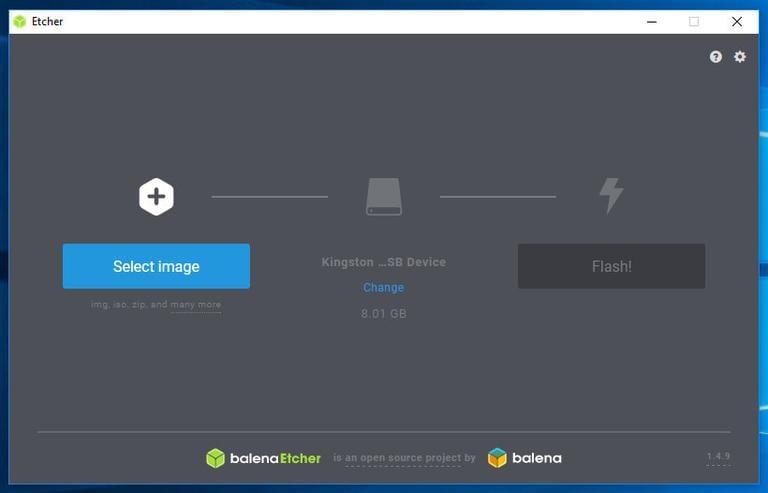
Click on the
Select imagebutton and locate your Ubuntu.isofile. If you downloaded the file using a web browser, then it should be stored in theDownloadsfolder located in your user account.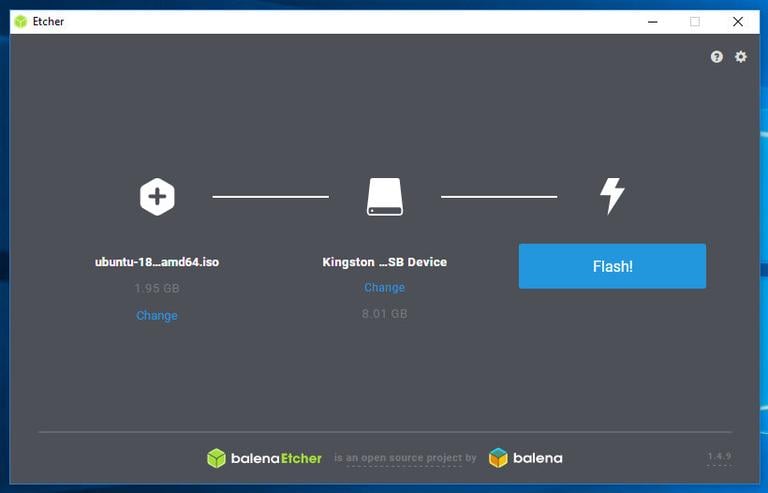
Etcher will autoselect the USB drive if only one drive is present. Otherwise, if more than one SD card or USB stick is attached, make sure you have selected the correct USB drive before flashing the image.
Click on the
Flash imagebutton, and the flashing process will start.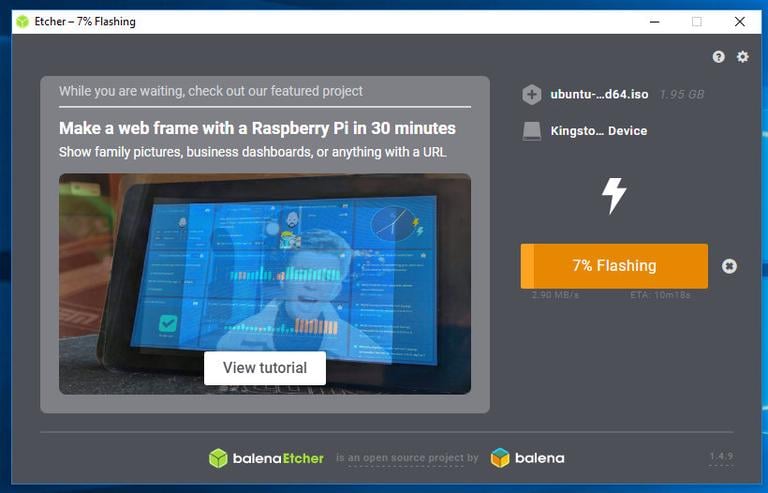
Etcher will show a progress bar and ETA while flashing the image.
The process may take several minutes, depending on the size of the ISO file and the USB stick speed. Once completed, the following screen will appear informing you that the image is successfully flashed.
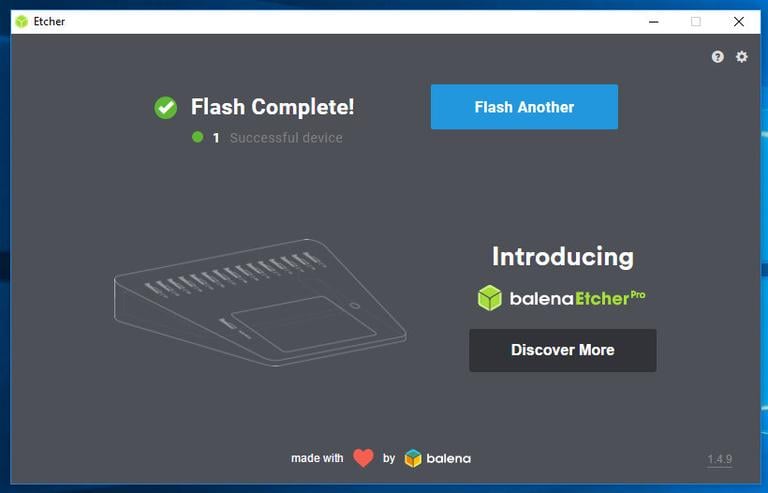
Click on the
[X]to close the Etcher window.
That’s all! You have a bootable Ubuntu on your USB stick.
Conclusion
You have learned how to create a bootable Ubuntu USB stick on Windows.
If you hit a problem or have feedback, leave a comment below.
