How to Install CouchDB on CentOS 7
Published on
•3 min read

Apache CouchDB is a free and open-source NoSQL database developed by the Apache Software Foundation.
CouchDB server stores its data in named databases which contains documents with JSON structure. Each document consists of a number of fields and attachments. Fields can include text, numbers, lists, booleans, more. It includes a RESTful HTTP API that allows you to read, create, edit and delete database documents.
In this tutorial, we will explain how to install the latest version of CouchDB on CentOS 7.
Prerequisites
To be able to install new packages on your CentOS system, you must be logged in as a user with sudo privileges .
Enable CouchDB Repository
The CouchDB repository depends on the EPEL repository . If the EPEL repository is not enabled on your system, enable it by typing:.
sudo yum install epel-releaseNext, open your editor of choice and create the CouchDB repository file:
sudo nano /etc/yum.repos.d/bintray-apache-couchdb-rpm.repoPaste the following content into the file:
[bintray--apache-couchdb-rpm]
name=bintray--apache-couchdb-rpm
baseurl=http://apache.bintray.com/couchdb-rpm/el$releasever/$basearch/
gpgcheck=0
repo_gpgcheck=0
enabled=1
Save the file and close the editor.
Install CouchDB on CentOS
Now that the repository is enabled, you can install the CouchDB packages using the following command:
sudo yum install couchdbOnce the installation is completed, enable and start the CouchDB service:
sudo systemctl start couchdbsudo systemctl enable couchdb
By default, CouchDB listens on localhost only and no admin account is created.
Apache CouchDB data and configuration files are stored in the /opt/couchdb directory. To create an admin account open the local.ini file and add a line under the [admins] section in the format username = password.
sudo nano /opt/couchdb/etc/local.ini[admins]
admin = mysecretpassword
Transform the password to a hash, by restarting the CouchDB service:
sudo systemctl restart couchdbUse the same format to add multiple admin accounts. You’ll need to restart the CouchDB service after adding a new account.
Use curl to create the system databases: _users, _replicator and _global_changes :
curl -u ADMINUSER:PASS -X PUT http://127.0.0.1:5984/_userscurl -u ADMINUSER:PASS -X PUT http://127.0.0.1:5984/_replicatorcurl -u ADMINUSER:PASS -X PUT http://127.0.0.1:5984/_global_changes
Each command should return the following:
{"ok":true}
Verifying CouchDB Installation
To verify whether the installation was performed successfully, issue the following curl
command that will print the CouchDB database information in JSON format:
curl http://127.0.0.1:5984/For clarity the output below is formatted.
{
   "couchdb":"Welcome",
   "version":"2.3.1",
   "git_sha":"c298091a4",
   "uuid":"17a6b911e0d5bfe36778b387510dbd93",
   "features":[
      "pluggable-storage-engines",
      "scheduler"
   ],
   "vendor":{
      "name":"The Apache Software Foundation"
   }
}
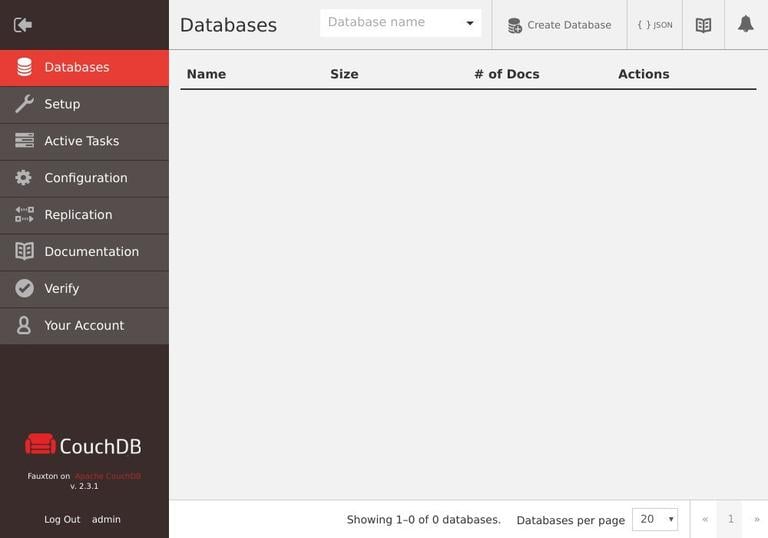
If you prefer GUI, you can access the CouchDB web-based interface, Fauxton at:
http://127.0.0.1:5984/_utils/

Conclusion
You have learned how to install CouchDB CentOS 7. Your next step could be to visit the Apache CouchDB Documentation and find more information on this topic.
Feel free to leave a comment if you have any questions.


