Generate SSH Keys on Windows with PuTTYgen

Secure Shell (SSH) is a cryptographic network protocol used for a secure connection between a client and a server and supports various authentication mechanisms.
The two most popular mechanisms are passwords based authentication and public key-based authentication. Using SSH keys is more secure and convenient than traditional password authentication.
This tutorial explains how to generate SSH keys on Windows with PuTTYgen. We will also show you how to set up an SSH key-based authentication and connect to your remote Linux servers without entering a password.
Downloading PuTTYgen
PuTTYgen is an open-source utility that allows you to generate SSH keys for the most popular Windows SSH client PuTTY .
PuTTYgen is available as a standalone executable file, and it is also a part of the PuTTY .msi installation package. If you don’t have PuTTYgen installed, head over to the PuTTY download page and download the PuTTY installation package. The installation is simple, double-click on the installation package and follow the instructions.
Creating SSH keys with PuTTYgen
To generate an SSH key pair on Windows using PuTTYgen, perform the following steps:
Launch PuTTYgen by double-clicking on its “.exe” file or by going to the Windows Start menu → PuTTY (64-bit) → PuTTYgen.
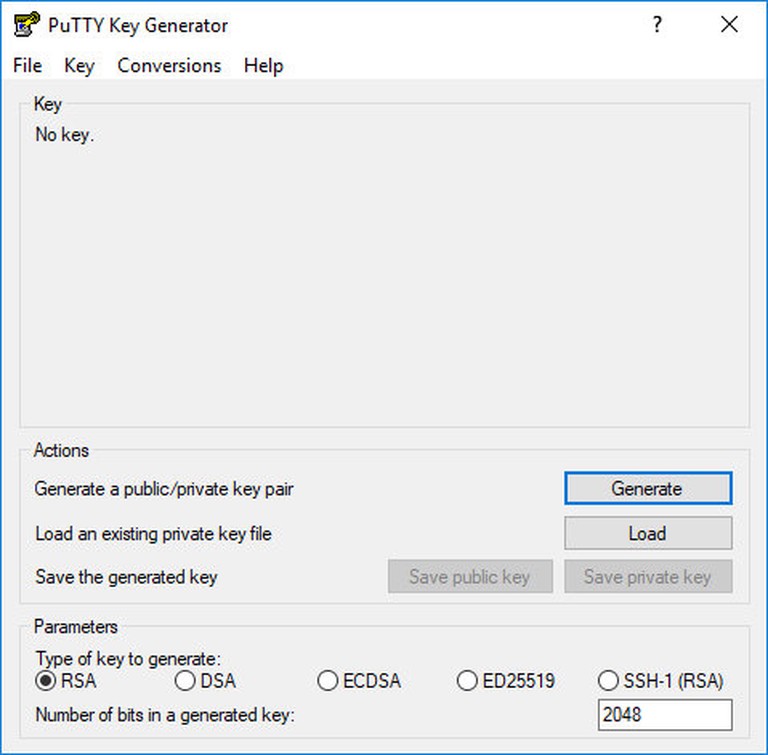
In the “Type of key to generate” block leave the default RSA. In the “Number of bits in a generated key” field leave the default value 2048, which is sufficient for most use cases. Optionally, you can change it to 4096.
Click the “Generate” button to start the process of generating the new key pair.
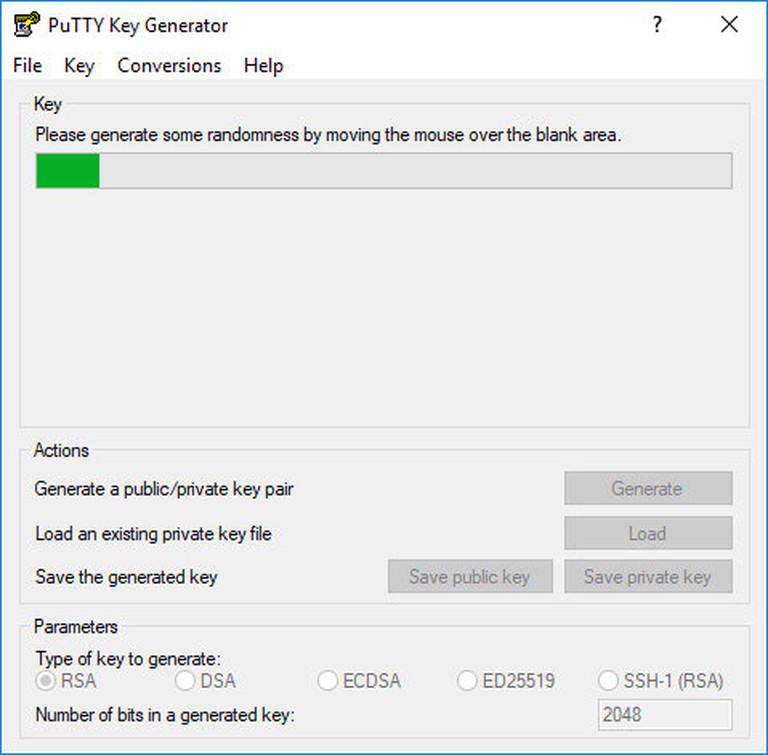
You will be asked to move your mouse over the blank area of the Key section to generate some randomness. As you move the pointer, the green progress bar will advance. The process should take a few seconds.
Once the public key is generated it will be displayed in the “Key” block.
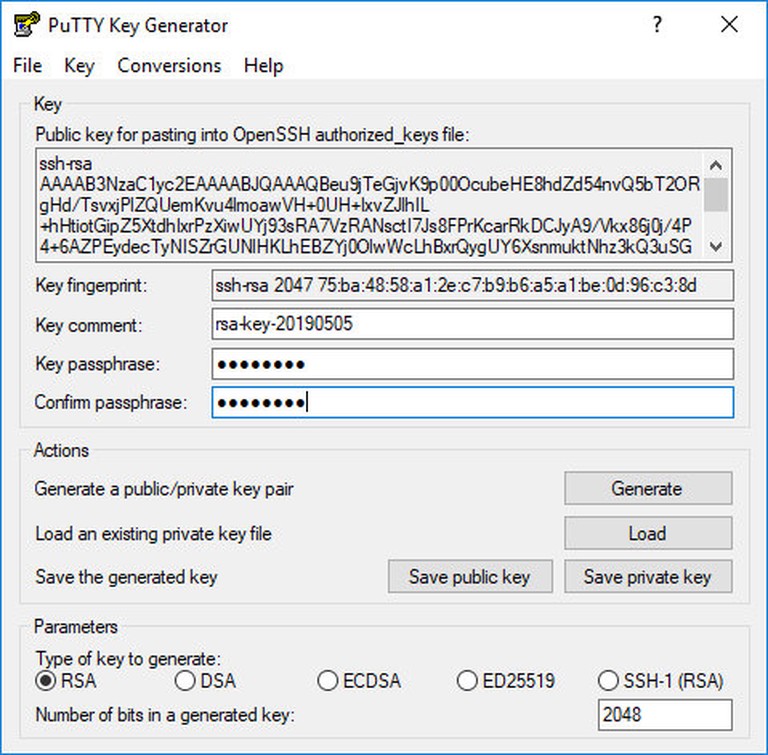
If you want set a passphrase, type it in the “Key passphrase” field and confirm the same passphrase in the “Confirm passphrase” field. If you don’t want to use a passphrase leave the fields blank.
It is recommended to use a passphrase when the private key files are intended for interactive use. Otherwise, when generating a key for automation, it may be set without a passphrase.
A passphrase adds an extra layer of security by protecting the private key from unauthorized use.
When a passphrase is set, it needs to be typed each time the private key is used.
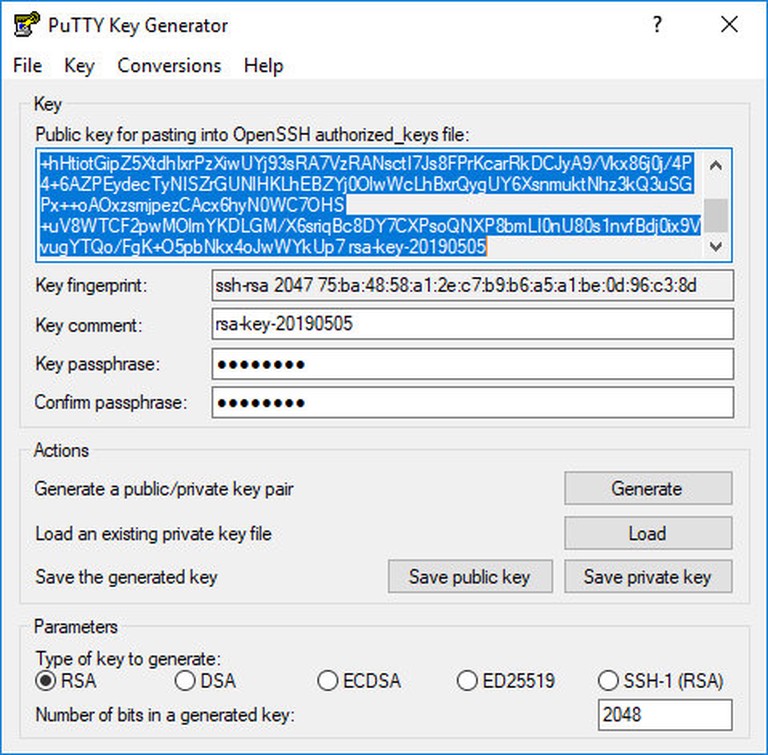
Save the private key by clicking the “Save private key” button. You can save the file in any directory as a “.ppk” file (PuTTY Private Key), but it is advisable to save in a place where you can easily find it. It’s common to use a descriptive name for the private key file.
Optionally, you can also save the public key, though it can be regenerated later by loading the private key.
Right-click in the text field labeled “Public key for pasting into OpenSSH authorized_keys file” and select all characters by clicking “Select all”. Open a text editor, paste the characters and save it. Be sure you are pasting the entire key. It is advisable to save the file in the same directory where you saved the private key, using the same name the private key and “.txt” or “.pub” as a file extension.
This is the key that you should add to your remote Linux server.


Copying the Public Key to the Server
Now that the SSH key pair is generated, the next step is to copy the public key to the server you want to manage.
Launch the PuTTY program and login to your remote Linux server.
If your user SSH directory does not exist, create it with the mkdir command
and set the correct permissions:
mkdir -p ~/.ssh
chmod 0700 ~/.ssh
Open a text editor
and paste the public key that you copied in step 4 when generating the key pair into the ~/.ssh/authorized_keys file:
nano ~/.ssh/authorized_keysThe entire public key text must be on a single line.
Run the following chmod
command to ensure only your user can read and write the ~/.ssh/authorized_keys file:
chmod 0600 ~/.ssh/authorized_keysLogin to the Server using SSH Keys
Pageant is a PuTTY SSH authentication agent that holds the private keys in the memory. Pageant binary is a part of the PuTTY .msi installation package and can be launch by going to the Windows Start menu → PuTTY (64-bit) → Pageant.
When you start Pageant, it will place an icon into the system tray. Double-click on the icon, and the Pageant window will open.
To load a key, press the “Add Key” button, which will open a new file dialog. Locate the private key file, and press “Open”. If you haven’t set a passphrase, the key will be loaded in immediately. Otherwise, you will be prompted to enter the passphrase.

Enter the password, and Pageant will load the private key.
After completing the steps above, you should be able to log in to the remote server without being prompted for a password.
To test it out, open a new PuTTY SSH session and try to login into the remote server. PuTTY will use the loaded key, and you will be logged into the server without entering the password.
Disabling SSH Password Authentication
To add an extra layer of security to your server, you can disable password authentication for SSH.
Before disabling the SSH password authentication make sure you can log in to your server without a password, and the user you are logging in with has sudo privileges .
Log into the remote server and open the SSH configuration file:
sudo nano /etc/ssh/sshd_configSearch for the following directives and modify as it follows:
PasswordAuthentication no
ChallengeResponseAuthentication no
UsePAM no
Once you are done, save the file and restart the SSH service by typing:
sudo systemctl restart sshAt this point, the password-based authentication is disabled.
Conclusion
In this tutorial, you have learned how to generate a new SSH key pair and set up an SSH key-based authentication. You can add the same key to multiple remote servers. We have also shown you how to disable SSH password authentication and add an extra layer of security to your server.
By default, SSH listens on port 22. Changing the default SSH port will reduce the risk of automated attacks.
If you have any questions or feedback, feel free to leave a comment.
Linuxize Weekly Newsletter
A quick weekly roundup of new tutorials, news, and tips.
About the authors

Dejan Panovski
Dejan Panovski is the founder of Linuxize, an RHCSA-certified Linux system administrator and DevOps engineer based in Skopje, Macedonia. Author of 800+ Linux tutorials with 20+ years of experience turning complex Linux tasks into clear, reliable guides.
View author page