How to Enable SSH on Ubuntu

Secure Shell (SSH) is a network protocol that allows you to securely connect to a remote server or computer over an encrypted connection. With SSH enabled, you can remotely manage your Ubuntu system, run administrative commands, and transfer files securely using tools like scp
and sftp
.
This guide explains how to enable SSH on Ubuntu 20.04, 22.04, and 24.04, connect to it remotely, and manage the SSH service.
Quick Reference
| Task | Command |
|---|---|
| Install OpenSSH server | sudo apt install openssh-server |
| Check SSH service status | sudo systemctl status ssh |
| Start SSH | sudo systemctl start ssh |
| Stop SSH | sudo systemctl stop ssh |
| Enable SSH on boot | sudo systemctl enable ssh |
| Disable SSH | sudo systemctl disable --now ssh |
| Allow SSH through UFW | sudo ufw allow ssh |
| Connect to remote host | ssh username@ip_address |
For a printable quick reference, see the SSH cheatsheet .
Enabling SSH on Ubuntu
By default, on fresh installs, Ubuntu does not allow SSH connections. You must enable it manually.
Follow the steps below as root or a user with sudo privileges to install and enable SSH on your Ubuntu system:
Open the terminal using
Ctrl+Alt+Tand install theopenssh-serverpackage:Terminalsudo apt update sudo apt install openssh-serverWhen prompted, enter your password, then press
Enterto continue the installation.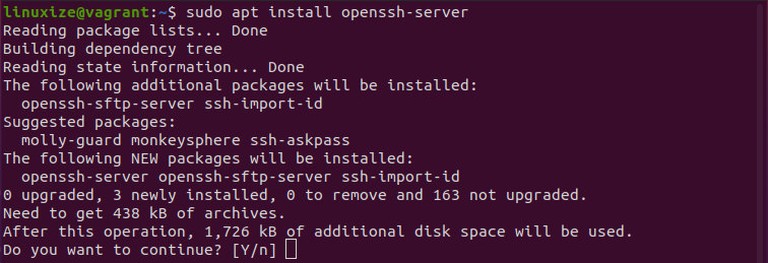
After the installation is complete, the SSH service starts automatically. Verify that SSH is running:
Terminalsudo systemctl status sshThe output should tell you that the service is running and enabled to start on system boot:
output● ssh.service - OpenBSD Secure Shell server Loaded: loaded (/lib/systemd/system/ssh.service; enabled; vendor preset: enabled) Active: active (running) since Mon 2025-06-01 12:34:00 CEST; 9h ago ...Press
qto exit the status screen and get back to the command line prompt.Ubuntu ships with a firewall configuration tool called UFW. If the firewall is enabled on your system, make sure to open the SSH port:
Terminalsudo ufw allow ssh

That is it! You can now connect to your Ubuntu system via SSH from any remote machine. Linux and macOS systems include an SSH client by default. On Windows 10 and 11, you can use the built-in ssh client from PowerShell or Command Prompt, or use PuTTY
if you prefer a graphical SSH client.
Connecting to the SSH Server
To connect to your Ubuntu machine over LAN, invoke the ssh command
followed by the username and the IP address in the following format:
ssh username@ip_addressIf you do not know the IP address, you can easily find it using the ip command
:
ip a
As you can see from the output, the system IP address is 10.0.2.15.
Once you have found the IP address, log in to the remote machine by running the following SSH
command:
ssh linuxize@10.0.2.15When you connect the first time, you will see a security warning like this:
The authenticity of host '10.0.2.15 (10.0.2.15)' can't be established.
ECDSA key fingerprint is SHA256:Vybt22mVXuNuB5unE++yowF7lgA/9/2bLSiO3qmYWBY.
Are you sure you want to continue connecting (yes/no)?
Type yes, and you will be prompted to enter your password.
Warning: Permanently added '10.0.2.15' (ECDSA) to the list of known hosts.
linuxize@10.0.2.15's password:
Once you enter the password, you will be logged into your system and greeted with the default Ubuntu message:
Welcome to Ubuntu 24.04 LTS (GNU/Linux 6.8.0-45-generic x86_64)

 * Documentation:  https://help.ubuntu.com
 * Management:     https://landscape.canonical.com
 * Support:        https://ubuntu.com/pro
...
You are now logged in to your Ubuntu machine.
Connecting to SSH behind NAT
To connect to your home Ubuntu machine over the Internet, you will need to know your public IP address and configure your router to accept incoming traffic on port 22 and forward it to the Ubuntu system where SSH is running.
Find Your Public IP Address To determine the public IP address of the machine you are trying to SSH to, visit the following URL:
https://api.ipify.org.Configure Port Forwarding When it comes to setting up port forwarding on your router, each device has its own interface and terminology. You should consult your router’s documentation for instructions on setting up port forwarding. In short, you need to enter the port number where requests will be made (the default SSH port is 22) and the private IP address you found earlier (using the
ip acommand) of the machine where SSH is running.Connect Using Public IP Once you have found the IP address, and configured your router, you can log in by typing:
Terminalssh username@public_ip_address
If you are exposing your home machine to the Internet, it is a good idea to implement some security measures. The most basic one is to configure your router to accept SSH traffic on a non-standard port and to forward it to port 22 on the machine running the SSH service.
You can also set up an SSH key-based authentication and connect to your Ubuntu machine without entering a password.
Disabling SSH on Ubuntu
To turn off the SSH server on your Ubuntu system, stop the SSH service by running:
sudo systemctl disable --now sshLater, to re-enable it, type:
sudo systemctl enable --now sshTroubleshooting
SSH service fails to start
Run sudo journalctl -u ssh to see the error. A common cause is a misconfigured /etc/ssh/sshd_config. Test the config with sudo sshd -t before restarting the service.
Connection refused on port 22
Confirm the SSH service is running with sudo systemctl status ssh. If UFW is active, verify the rule is in place with sudo ufw status and re-run sudo ufw allow ssh if it is missing.
Host key verification failed
This happens when the remote host’s key has changed (for example, after a reinstall). Remove the old entry with ssh-keygen -R ip_address and reconnect.
Permission denied (publickey)
If you use key-based auth, ensure the correct private key is available (~/.ssh/id_rsa or ~/.ssh/id_ed25519) and that ~/.ssh/authorized_keys on the server contains the matching public key with permissions 600.
FAQ
Does this work on Ubuntu 22.04 and 24.04?
Yes. The openssh-server package and systemctl commands are the same across Ubuntu 20.04, 22.04, and 24.04.
What port does SSH use by default?
SSH uses port 22 by default. You can change the default SSH port
to reduce automated login attempts.
How do I connect without a password?
Set up SSH key-based authentication
to log in using a key pair instead of a password.
How do I connect to multiple servers more easily?
Define your hosts in the SSH config file
so you can connect with a short alias instead of typing the full address each time.
Conclusion
We have shown you how to install and enable SSH on Ubuntu systems. With SSH enabled, you can manage your system remotely, securely transfer files, and perform everyday administrative tasks without physical access.
If you manage multiple systems, you can simplify your workflow by defining all your connections in the SSH config file . Changing the default SSH port adds an extra layer of security to your system by reducing the risk of automated attacks.
Linuxize Weekly Newsletter
A quick weekly roundup of new tutorials, news, and tips.
About the authors

Dejan Panovski
Dejan Panovski is the founder of Linuxize, an RHCSA-certified Linux system administrator and DevOps engineer based in Skopje, Macedonia. Author of 800+ Linux tutorials with 20+ years of experience turning complex Linux tasks into clear, reliable guides.
View author page