How to Install OpenCart on Ubuntu 18.04
Published on
•6 min read

OpenCart is a free and open-source PHP e-commerce platform combining powerful features with flexibility and user-friendly interface.
With features like User Management, Multi-Store, Affiliates, Discounts, Product Reviews, Multi-lingual and multiple Payment Gateways, OpenCart is a platform of choice for many online merchants.
In this tutorial, we will show you how to install OpenCart on Ubuntu 18.04 server. We’ll be using Nginx as a web server, the latest PHP 7.2 and MySQL/MariaDB as a database server.
Prerequisites
Ensure that you have met the following prerequisites before continuing with this tutorial:
- Have a domain name pointing to your public server IP. We will use
example.com. - Nginx is installed on your Ubuntu server by following these instructions .
- An SSL certificate installed for your domain to encrypt user’s information. You can install a free Let’s Encrypt SSL certificate by following these instructions .
Update the system packages to the latest versions and install the unzip utility :
sudo apt update && sudo apt upgradesudo apt install unzip
Creating MySQL database
If you have MySQL or MariaDB installed on your server you can skip this step, if not you can install the MySQL 5.7 server package from the Ubuntu’s default repositories by typing:
sudo apt install mysql-server mysql-clientmysql_secure_installation command to improve the security of your MySQL server.Login to the MySQL shell using the following command:
sudo mysqlFrom within the MySQL shell, run the following SQL statement to create a new database
named opencart:
CREATE DATABASE opencart;Next, create a MySQL user account named opencart and grant the necessary permissions to the user
by running the following command:
GRANT ALL ON opencart.* TO 'opencart'@'localhost' IDENTIFIED BY 'change-with-strong-password';change-with-strong-password with a strong password.Once done, exit the mysql console by typing:
EXIT;Installing and Configuring PHP
PHP 7.2 which is the default PHP version in Ubuntu 18.04 is fully supported and recommended for OpenCart. Since we will be using Nginx as a web server we’ll also install the PHP-FPM package.
Run the following command to install PHP and all required PHP modules:
sudo apt install php7.2-common php7.2-cli php7.2-fpm php7.2-opcache php7.2-gd php7.2-mysql php7.2-curl php7.2-intl php7.2-xsl php7.2-mbstring php7.2-zip php7.2-bcmath php7.2-soapPHP-FPM service will automatically start after the installation process is complete, you can verify it by printing the service status:
sudo systemctl status php7.2-fpmThe output should indicate that the fpm service is active and running.
● php7.2-fpm.service - The PHP 7.2 FastCGI Process Manager
   Loaded: loaded (/lib/systemd/system/php7.2-fpm.service; enabled; vendor preset: enabled)
   Active: active (running) since Mon 2019-02-25 10:45:42 UTC; 53s ago
     Docs: man:php-fpm7.2(8)
 Main PID: 27446 (php-fpm7.2)
   Status: "Processes active: 0, idle: 2, Requests: 0, slow: 0, Traffic: 0req/sec"
    Tasks: 3 (limit: 505)
   CGroup: /system.slice/php7.2-fpm.service
           ├─27446 php-fpm: master process (/etc/php/7.2/fpm/php-fpm.conf)
Set the required and recommended PHP options by editing the php.ini file with sed
::
sudo sed -i "s/memory_limit = .*/memory_limit = 1024M/" /etc/php/7.2/fpm/php.inisudo sed -i "s/upload_max_filesize = .*/upload_max_filesize = 256M/" /etc/php/7.2/fpm/php.inisudo sed -i "s/zlib.output_compression = .*/zlib.output_compression = on/" /etc/php/7.2/fpm/php.inisudo sed -i "s/max_execution_time = .*/max_execution_time = 18000/" /etc/php/7.2/fpm/php.inisudo sed -i "s/;date.timezone.*/date.timezone = UTC/" /etc/php/7.2/fpm/php.inisudo sed -i "s/;opcache.save_comments.*/opcache.save_comments = 1/" /etc/php/7.2/fpm/php.ini
Installing OpenCart
At the time of writing this article, the latest stable version of OpenCart is version 3.0.3.1.
Before downloading the OpenCart archive, first create a directory which will hold our OpenCart files:
sudo mkdir -p /var/www/html/example.comDownload the latest version of OpenCart from the OpenCart Github repository using the following wget command :
cd /tmpwget https://github.com/opencart/opencart/releases/download/3.0.3.1/opencart-3.0.3.1.zip
Once the download is complete, extract the OpenCart archive and move the extracted files into the domain’s document root directory:
unzip opencart-*.zipsudo mv /tmp/upload/* /var/www/html/example.com/
Copy the configurations files using the cp
command:
sudo cp /var/www/html/example.com/{config-dist.php,config.php}sudo cp /var/www/html/example.com/admin/{config-dist.php,config.php}
Set the correct permissions so that the web server can have full access to the site’s files and directories using the following chown command :
sudo chown -R www-data: /var/www/html
Configuring Nginx
By now, you should already have Nginx with SSL certificate installed on your Ubuntu server, if not check the prerequisites for this tutorial.
Open your text editor and create the following file:
sudo nano /etc/nginx/sites-available/example.com# Redirect HTTP -> HTTPS
server {
listen 80;
server_name www.example.com example.com;
include snippets/letsencrypt.conf;
return 301 https://example.com$request_uri;
}
# Redirect WWW -> NON WWW
server {
listen 443 ssl http2;
server_name www.example.com;
ssl_certificate /etc/letsencrypt/live/example.com/fullchain.pem;
ssl_certificate_key /etc/letsencrypt/live/example.com/privkey.pem;
ssl_trusted_certificate /etc/letsencrypt/live/example.com/chain.pem;
include snippets/ssl.conf;
return 301 https://example.com$request_uri;
}
server {
listen 443 ssl http2;
server_name example.com;
root /var/www/html/example.com;
index index.php;
# SSL parameters
ssl_certificate /etc/letsencrypt/live/example.com/fullchain.pem;
ssl_certificate_key /etc/letsencrypt/live/example.com/privkey.pem;
ssl_trusted_certificate /etc/letsencrypt/live/example.com/chain.pem;
include snippets/ssl.conf;
include snippets/letsencrypt.conf;
# log files
access_log /var/log/nginx/example.com.access.log;
error_log /var/log/nginx/example.com.error.log;
location = /favicon.ico {
log_not_found off;
access_log off;
}
location = /robots.txt {
allow all;
log_not_found off;
access_log off;
}
location / {
try_files $uri $uri/ /index.php?$args;
}
location ~ \.php$ {
include snippets/fastcgi-php.conf;
fastcgi_pass unix:/run/php/php7.2-fpm.sock;
}
location ~* \.(js|css|png|jpg|jpeg|gif|ico|svg)$ {
expires max;
log_not_found off;
}
}
Before restarting the Nginx service make a test to be sure that there are no syntax errors:
sudo nginx -tIf there are no errors the output should look like this:
nginx: the configuration file /etc/nginx/nginx.conf syntax is ok
nginx: configuration file /etc/nginx/nginx.conf test is successful
Finally, restart the Nginx service by typing:
sudo systemctl restart nginxCompleting the OpenCart Installation
Now that OpenCart is downloaded and the server configuration is complete, you can finish the installation through the web interface.
Open your browser, type your domain and a screen similar to the following will appear:
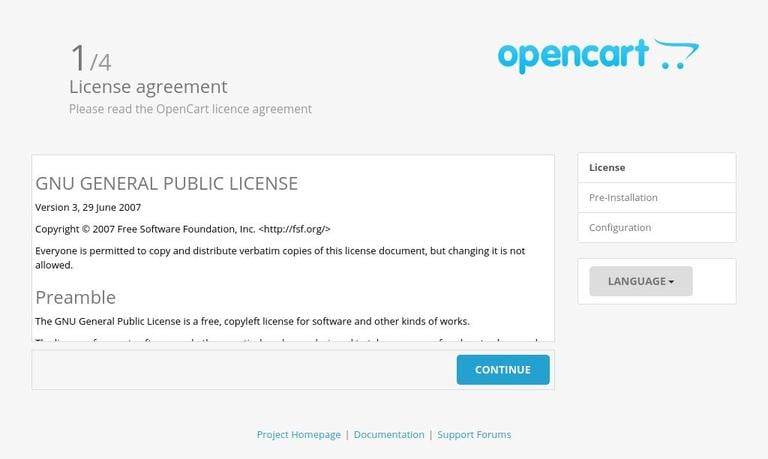
Read the OpenCart license agreement, select the language you would like to use and click on the Continue button.
Next, you will see the following information page:
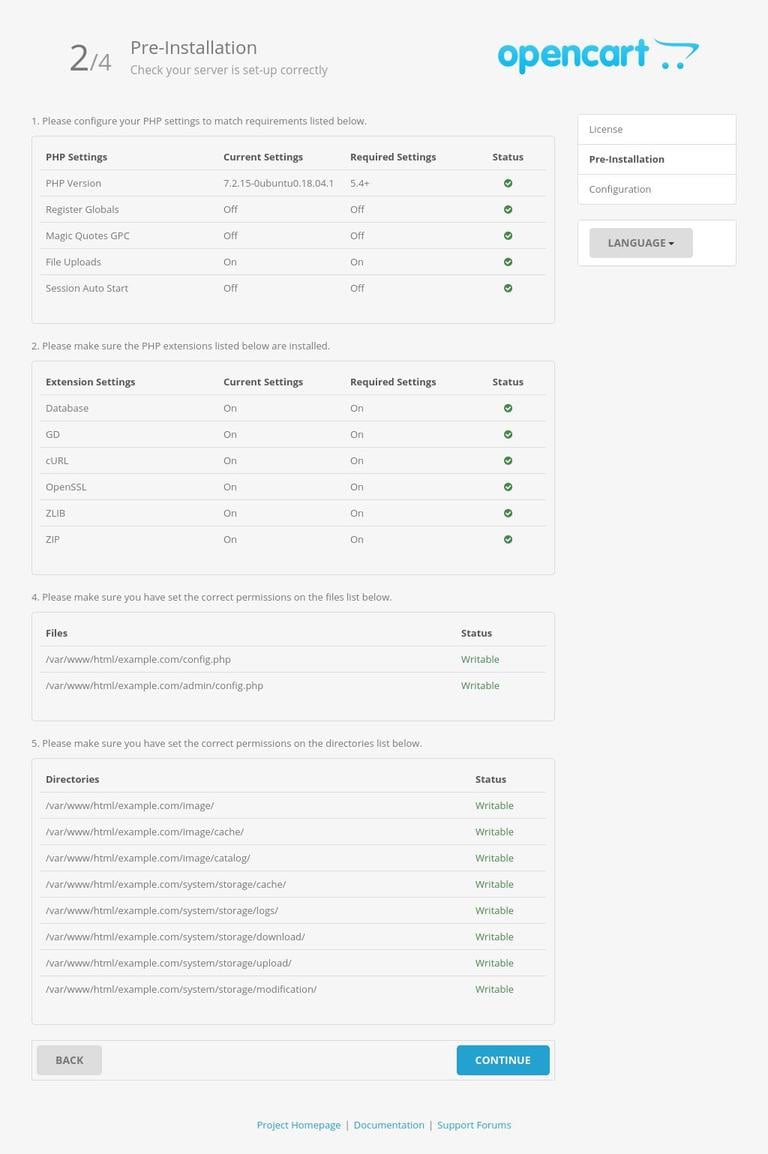
Make sure all pre-installation requirements are met and click on the Continue button.
On the next screen, the setup wizard will ask you to enter your database connection details. Enter the MySQL user and database details you previously created.
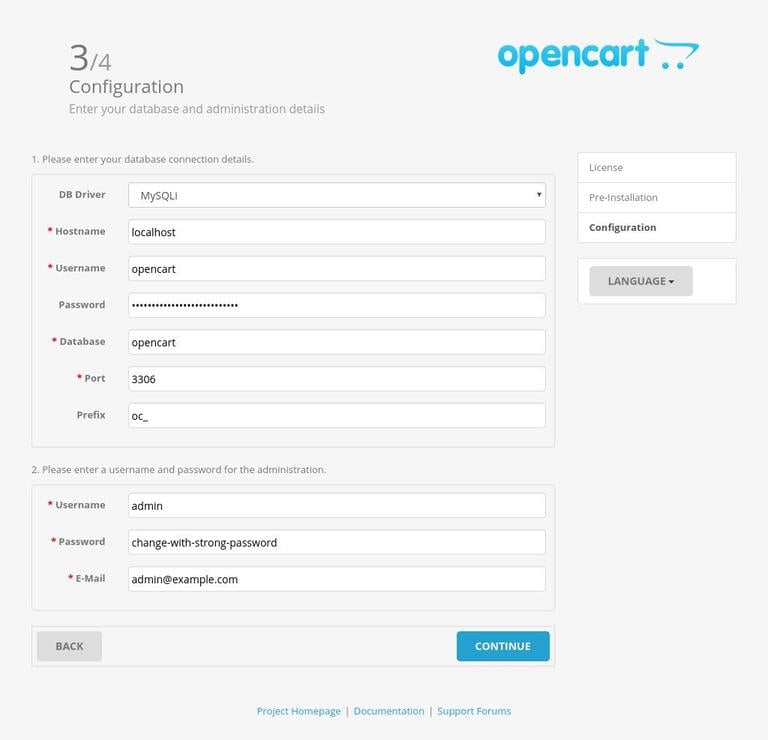
Enter a username, password and email address for the administration and start the installation by clicking on the Continue button.
Once the installation is completed you will be taken to a page informing you that OpenCart has been installed.
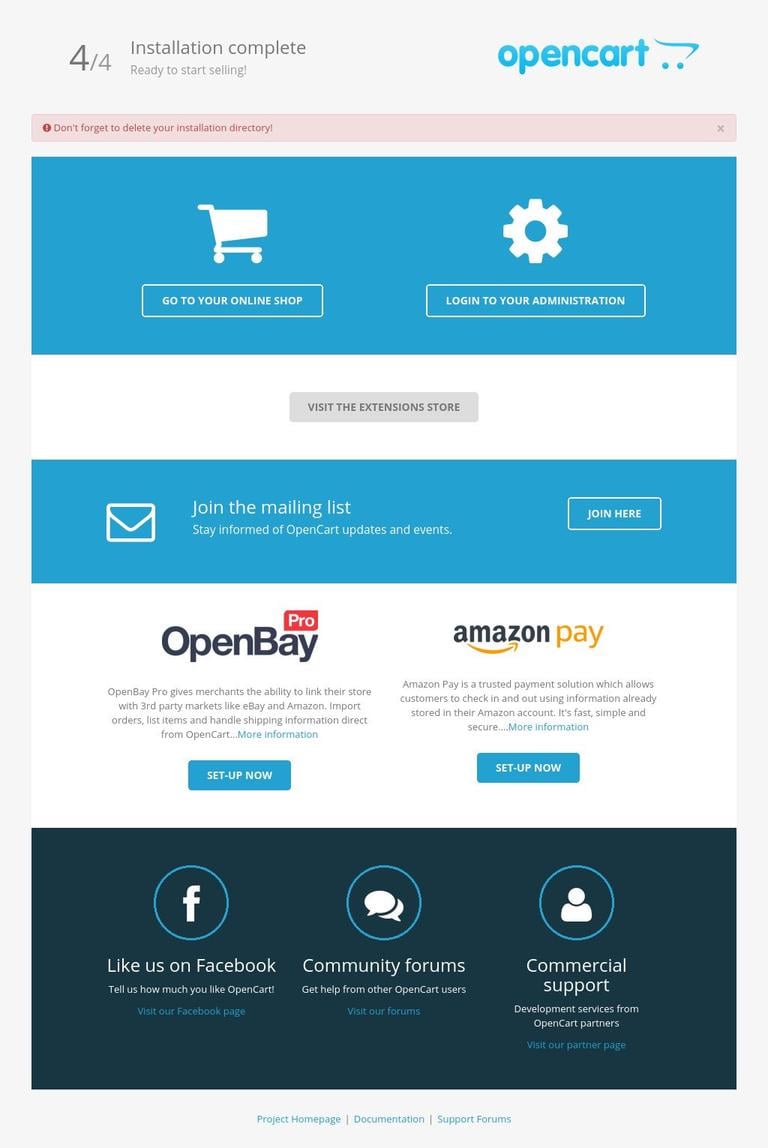
To access your OpenCart administrative dashboard click on the Login to your Administration button. Enter your username and password and you will be redirected to the administration dashboard.
The first time you log in, a pop-up will appear asking you to move the storage directory outside of the web directory.
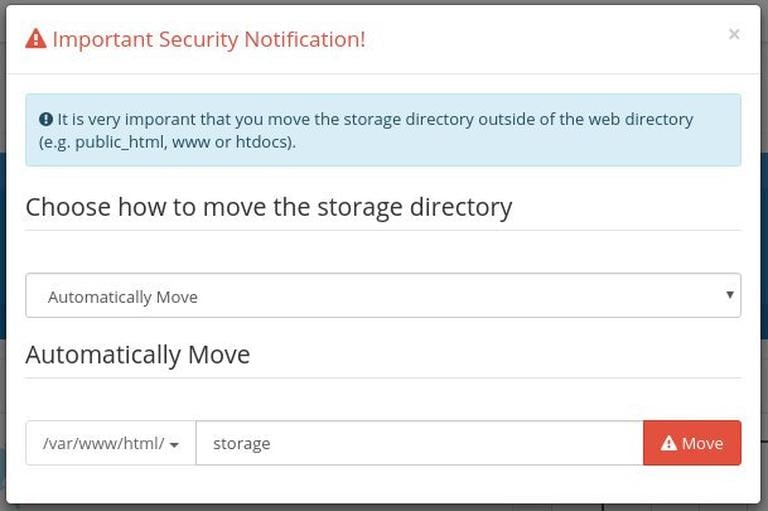
Keep the default Automatically Move option and click on the red Move button. The directory where you are moving the storage directory must be accessible by the web server.
From here, you can start customizing your OpenCart installation and add new products.
You’ll also need to delete the installation directory. To do so, go back to the terminal and type the following rm
command:
sudo rm -rf /var/www/html/example.com/installConclusion
Congratulations, you have successfully installed OpenCart on your Ubuntu 18.04 server.
OpenCart Documentation is a good starting place to learn more about how to manage your OpenCart installation.
If you have questions, feel free to leave a comment below.


